Sometimes, new features need to be tested in production and can't be simulated on staging environments. Luckily, a canary deployment allows us to have a new version in production which is separate from the customer’s version, so we are able to test new features without the worry of customers seeing it. Here are two of the ways I use to set up a canary deployment, one using a cookie and the other using a header.
Canary deployment allows for testing big impact changes in production
You probably know what a canary release or canary deployment is, but here is a sort of TL;DR - a canary release is a new version of an application deployed for testing purposes alongside a stable release.
At my company, we usually choose canary production because we want to make sure new changes work as expected in production. These are usually changes that can have a big impact on the experience of a customer. Think about payment transactions, manual regression of large refactors, major library changes, etc.
This is mostly due to the nature of the systems we work on: sometimes, settings on an acceptance or staging environment are still different from production. I have tested new features on acceptance in the past that ended up not working on production due to different settings. If I had a canary deployment at that time, I would have spotted this and not caused a production issue.
Harnessing Kubernetes Ingress Controllers for canary deployment
Kubernetes is a powerful software that a lot of companies use, including my own. This means there is a lot of support and community-driven ideas and solutions. In this article, we are going to utilise the Nginx Ingress Controller that is supported by Kubernetes to set up a canary deployment.
This Ingress Controller will route incoming requests to the right Service. However, an Ingress Controller is something that you usually have to deploy yourself to the Kubernetes cluster. Luckily, there are ways to have it out of the box by using Okteto or setup it up on a new Kubernetes cluster on Digital Ocean.
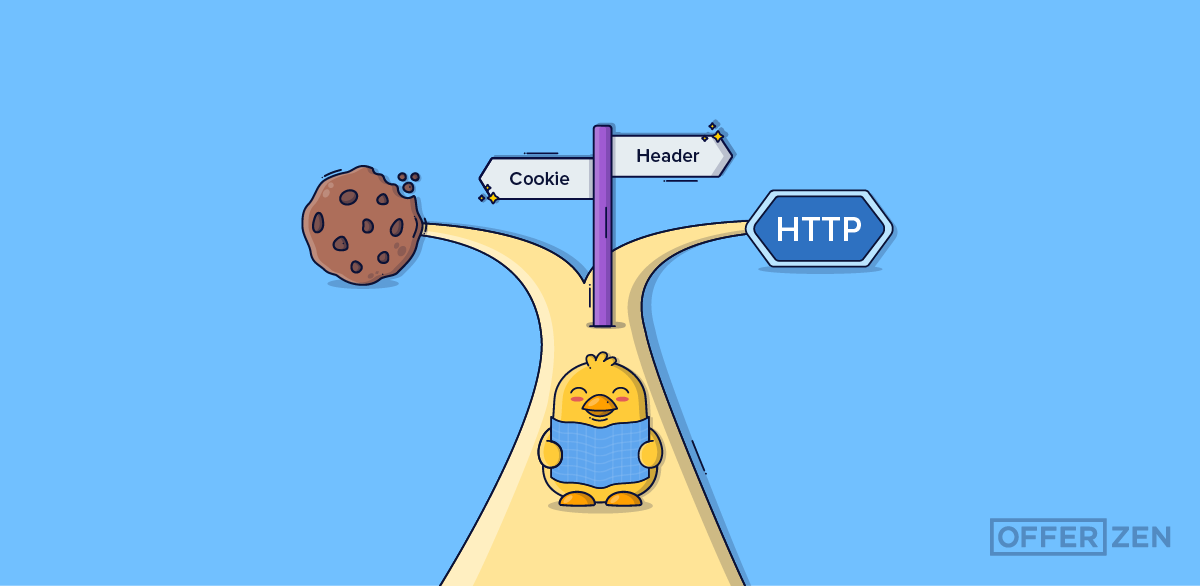
Choosing between the cookie and the header approach
Cookies and headers are two common techniques used in a canary release. They are both used to control which version of our application is visible to the user and can be used to redirect users to a specific version.
The 'cookie approach' in a canary deployment refers to the use of cookies to control which version of our application the user sees. This is great when testing, as you can set a cookie and see the updated version of your application. At my company, we make use of cookies when using canary release.
One of the benefits of using a cookie is that it can allow you to set-and-forget it, meaning that you are always on the canary version when you deploy. However, this can have a downside, as you could forget that you have set the cookie and might not be able to reproduce other issues. For example, when trying to recreate a production issue which might be present in a later version than the canary is on.
For me, I prefer to use the header approach for canary deployments. This approach uses HTTP headers to control which version is visible to users. A header is a more conscious decision than a cookie from a programmatic perspective and from a testing perspective. This is because it's not the obvious way of accessing something from the front end; you need to actively change something in your browser to send a specific extra header to the server.
In order for me to do this, I use a Chrome extension called ModHeader, which shows me a counter of the number of headers I have enabled at a time. That way, I can easily understand why I’m seeing my changes or when I’m not able to reproduce an issue.
Once we've decided which approach we want to use, we have to do a small bit of configuration to set up either the cookie or the header. And when that's in place, we can actually forget about the settings and start testing in canary whenever we need to without worrying about it.
Luckily, if we change our minds and want to switch between using a cookie in one instance and a header in another, then there is a way to do this.
Here is how to set up a canary deployment and how to switch between using a cookie and a header.
How I set up canary deployment in Kubernetes
Let's get started:
Requirements
-
Kubernetes cluster
-
Kubectl configured for that cluster
-
Nginx Ingress Controller
Disclaimer
This is not a Kubernetes beginner tutorial. To follow along, you should have knowledge about Services, Ingresses and Deployments within Kubernetes and how the traffic works between them. Here is a beginner's course.
Step 1: Setting up a default stable version
First, we need a deployment which we can use to see the differences between production and canary. In the code block below, we will create a Service, Ingress and Deployment with one replica. This uses the echoserver image, a debug pod, that will provide us with some metadata from the cluster.
# 1-production.yaml
apiVersion: v1
kind: Service
metadata:
  name: production
  labels:
    app: production
spec:
  ports:
  - port: 80
    targetPort: 8080
    protocol: TCP
    name: http
  selector:
    app: production

---

apiVersion: networking.k8s.io/v1
kind: Ingress
metadata:
  name: production
  annotations:
    kubernetes.io/ingress.class: nginx
    nginx.ingress.kubernetes.io/rewrite-target: /$1
    ingress.kubernetes.io/add-base-url: "true"
spec:
  rules:
  - host: echo-koenverburg.cloud.okteto.net
    http:
      paths:
      - path: /(.*)
        pathType: Exact
        backend:
          service:
            name: production
            port:
              number: 80

---

apiVersion: apps/v1
kind: Deployment
metadata:
  name: production
  labels:
    app: production
spec:
  replicas: 1
  selector:
    matchLabels:
      app: production
  template:
    metadata:
      labels:
        app: production
    spec:
      containers:
      - name: production
        image: mirrorgooglecontainers/echoserver:1.10
        ports:
        - containerPort: 8080
        env:
          - name: NODE_NAME
            valueFrom:
              fieldRef:
                fieldPath: spec.nodeName
          - name: POD_NAME
            valueFrom:
              fieldRef:
                fieldPath: metadata.name
          - name: POD_NAMESPACE
            valueFrom:
              fieldRef:
                fieldPath: metadata.namespace
          - name: POD_IP
            valueFrom:
              fieldRef:
                fieldPath: status.podIP
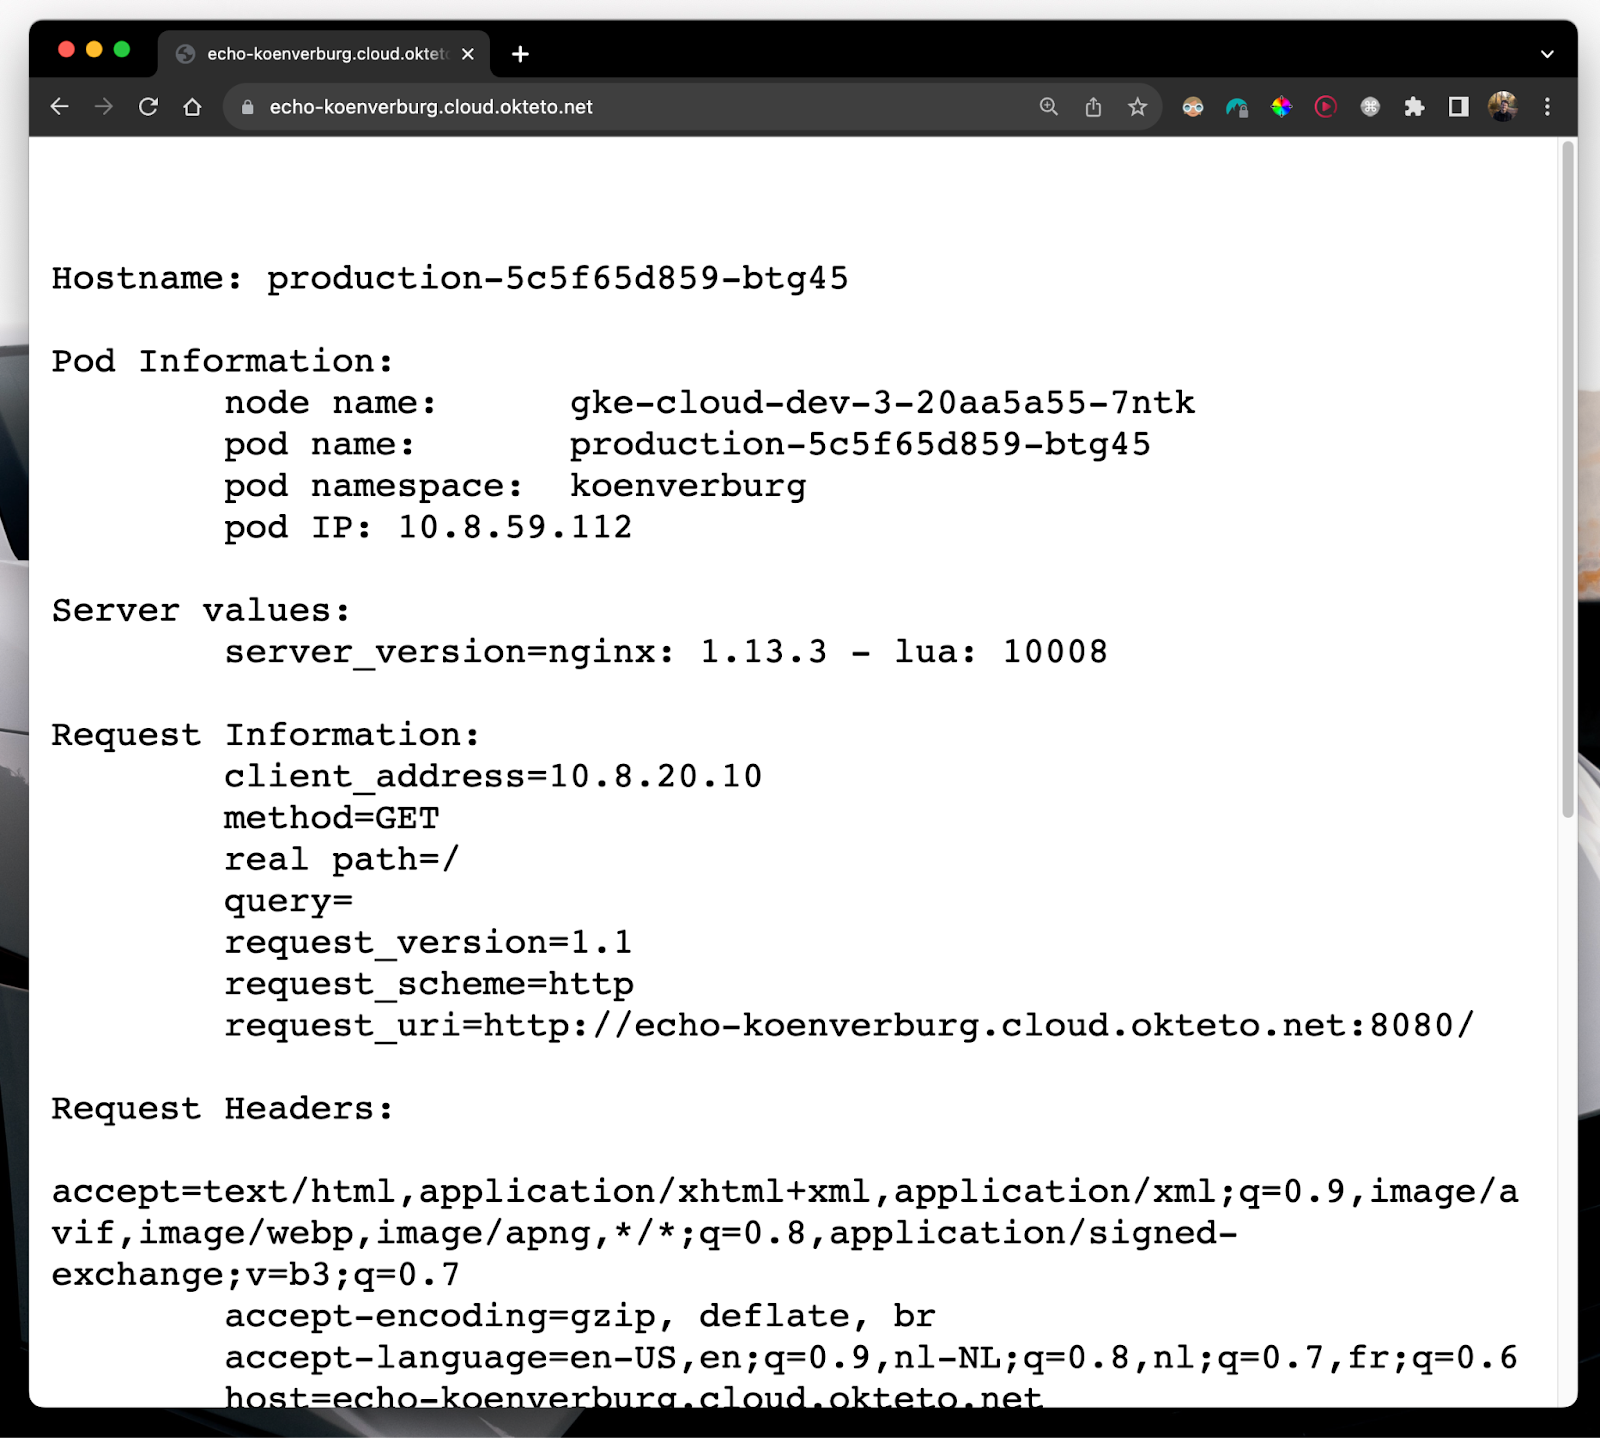
To create the production deployment, run the following command
kubectl create -f 1-production.yaml
Opening up the ingress URL that we set, we should be greeted with something like this:
Step 2: Setting up the service for canary deployment
Now let's prepare the canary. For this, we are going to create the Service and a Deployment.
In a real-world situation, you would create the Service and Ingress components in a set-and-forget way, while the Deployment is the moving part that changes over time. In the context of this how-to article, however, the Ingress will be the moving part and will be configured to utilise either cookies or headers to handle canary deployments effectively. This is because we will be switching between using a cookie and using a header - something that is not usually a common occurrence.
Let's deploy some stuff!
First, we need a specific Service to route the traffic from the canary Ingress to the canary deployment. The code for this is shown below.
# 2-canary-svc.yaml
apiVersion: v1
kind: Service
metadata:
  name: canary
  labels:
    app: canary
spec:
  ports:
  - port: 80
    targetPort: 8080
    protocol: TCP
    name: http
  selector:
    app: canary
Let's create the canary service by using the following command.
kubectl create -f 2-canary-svc.yaml
Next up, we need a Deployment which we serve as the canary version. Below we have the Deployment for this. It's the same as the "production" one we created earlier, but the naming is different. This way, we see visual changes in the browser when we set the cookie or header later in the article.
# 2-canary-deployment.yaml
apiVersion: apps/v1
kind: Deployment
metadata:
  name: canary
  labels:
    app: canary
spec:
  replicas: 1
  selector:
    matchLabels:
      app: canary
  template:
    metadata:
      labels:
        app: canary
    spec:
      containers:
      - name: production
        image: mirrorgooglecontainers/echoserver:1.10
        ports:
        - containerPort: 8080
        env:
          - name: NODE_NAME
            valueFrom:
              fieldRef:
                fieldPath: spec.nodeName
          - name: POD_NAME
            valueFrom:
              fieldRef:
                fieldPath: metadata.name
          - name: POD_NAMESPACE
            valueFrom:
              fieldRef:
                fieldPath: metadata.namespace
          - name: POD_IP
            valueFrom:
              fieldRef:
                fieldPath: status.podIP
Let's create the canary deployment using the following command.
kubectl create -f 2-canary-deployment.yaml
Now we have most of the work already done, and we can focus on the Ingresses so that we can access the canary.
Step 3a: Setting up using a cookie
Let’s start with the cookie. Here we have an Ingress manifest which has a couple of annotations instructing the Nginx Ingress Controller to treat this as a canary. It will also configure the canary to be accessible via a cookie.
# 3-canary-ingress-cookie.yaml
apiVersion: networking.k8s.io/v1
kind: Ingress
metadata:
  name: canary
  annotations:
    kubernetes.io/ingress.class: nginx
    nginx.ingress.kubernetes.io/canary: "true" # here we set the ingress to canary
    nginx.ingress.kubernetes.io/canary-by-cookie: "canary" # here we set it to use the cookie
spec:
  rules:
  - host: echo-koenverburg.cloud.okteto.net
    http:
      paths:
      - path: /(.*)
        pathType: Exact
        backend:
          service:
            name: canary
            port:
              number: 80
Let's create this ingress using the following command.
kubectl create -f 3-canary-ingress-cookie.yaml
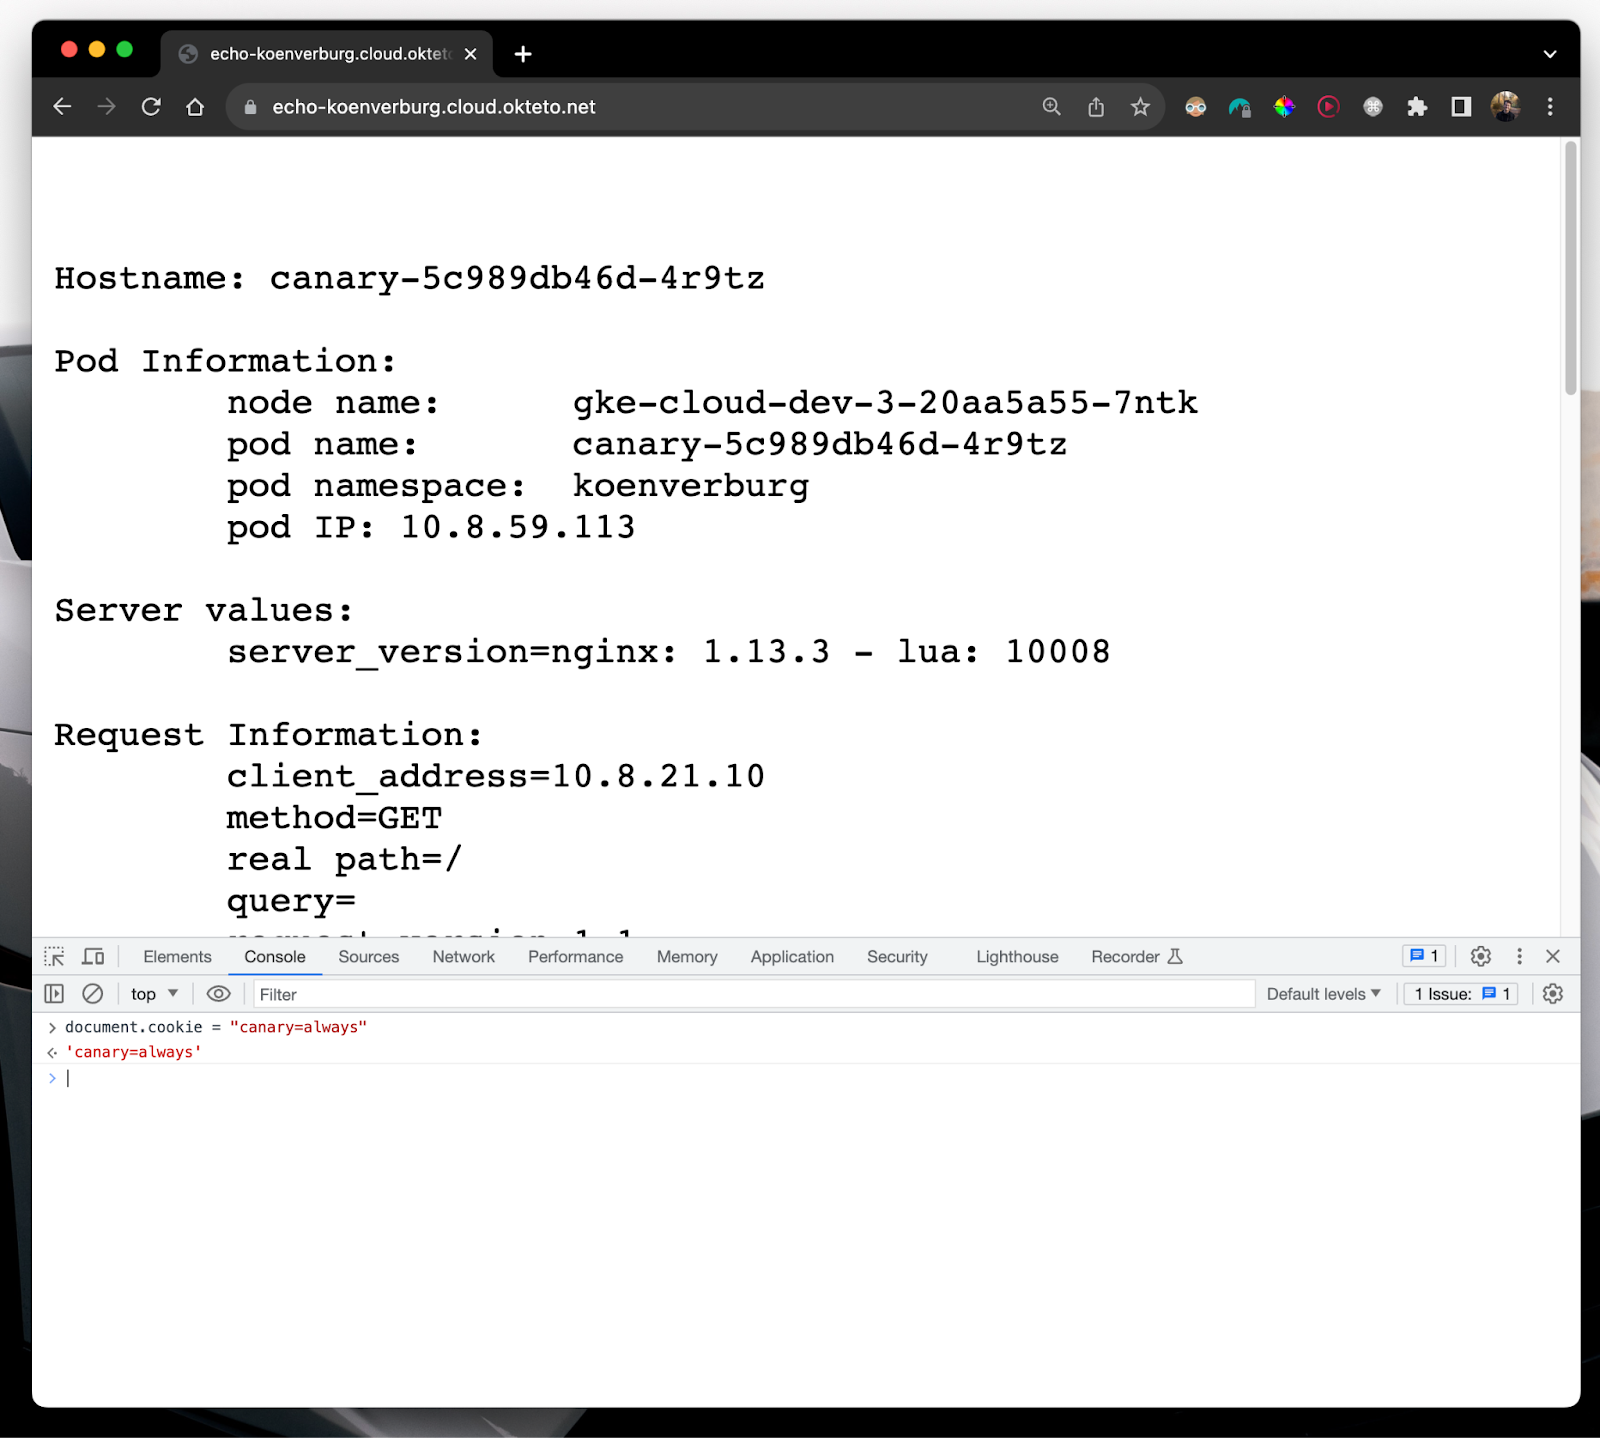
We can test this out by pasting the following code into your DevTool JavaScript console and setting the cookie to document.cookie = "canary=always". After this, refresh the browser, and you should see the canary pod information.
Step 3b: Removing the Ingress to set up a header
If we change our mind and want to set up the canary to access a header instead of a cookie, we need to remove the previously created Ingress, as it's only possible to have one canary at a time.
kubectl delete -f 3-canary-ingress-cookie.yaml
Now that we have a clean slate again, we can see how we can use the canary by setting up a header.
Step 3c: Setting up using a header
Here, we have an Ingress manifest which has a couple of annotations that look similar to the cookie example, but it's a little different. In the cookie one, the annotation is “canary-by-cookie”, and with the header, it’s “canary-by-header”.
# 4-canary-ingress-header.yaml
apiVersion: networking.k8s.io/v1
kind: Ingress
metadata:
  name: canary
  annotations:
    kubernetes.io/ingress.class: nginx
    nginx.ingress.kubernetes.io/canary: "true"
    nginx.ingress.kubernetes.io/canary-by-header: "x-canary" # here
    nginx.ingress.kubernetes.io/canary-by-header-value: "true"

spec:
  rules:
  - host: echo-koenverburg.cloud.okteto.net
    http:
      paths:
      - path: /(.*)
        pathType: Exact
        backend:
          service:
            name: canary
            port:
              number: 80
Let's create the canary Ingress using the following command.
kubectl create -f 4-canary-ingress-header.yaml
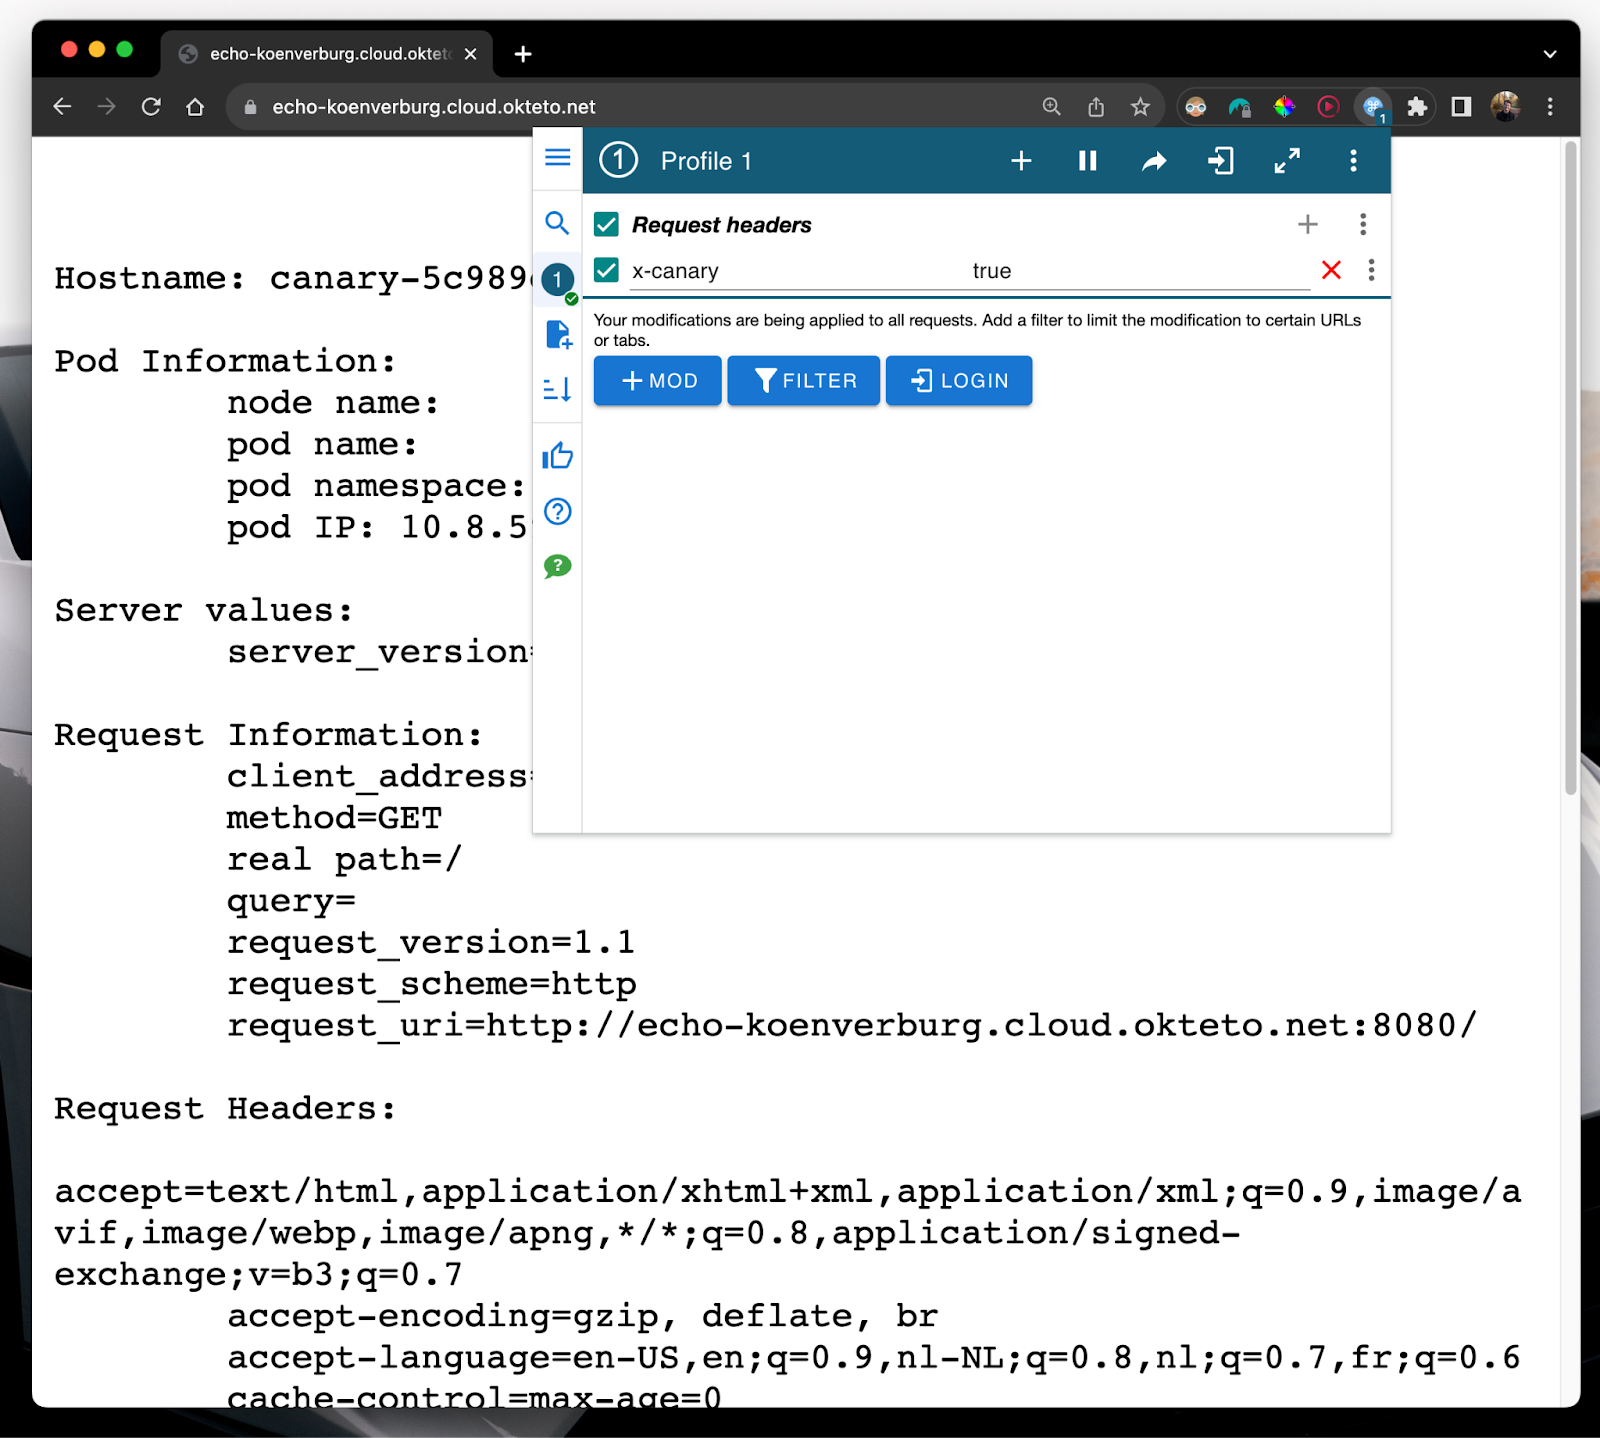
Now that we have the header access configured, we need to install another extension which allows us to set custom headers in Google Chrome. You can download my extension of choice, ModHeader, here.
Then you can set the header x-canary with the value of true.
You should see something that looks similar to the screenshot below. It's just out of frame in the screenshots, but the header should also appear in the request headers section.
Conclusion
Now you know how to set up either approach and switch between them. Knowing this method has allowed me to easily switch between using a cookie approach for work and using a header approach for other projects, giving me flexibility on how I want to use canary deployment and how I can test my applications safely.
Remember, a header is something that you turn on and off, which for me, feels a bit more like a conscious decision. While a cookie can be forgotten, which can have negative side effects. Which one are you going to use?
For more, check out my GitHub:
Koen Verburg is a Senior Software Engineer at Adidas, and a DevOps and Automation Advocate.
Read more
- Conquering Elastic Kubernetes Service secondary subnets in Terraform
- Enabling Self-Service Access to Cluster Resources with Kubernetes
- 4 DevOps best practices to speed up feature delivery