Self-driving cars are a major topic of interest in automobile research, because they're safer and more fuel-efficient. As a machine-learning hobbyist intrigued by self-driving cars, I've always wanted to build one myself in a simulated environment. By using the power and accessibility of deep-learning, I achieved this in under a week. In this article, I'll demonstrate the value of deep-learning by explaining how I did it and how others can reproduce this too.
My goal
Growing-up, I used to love driving-games. Getting home from school and racing against my brother in Gran Turismo, or chasing after cars in Need for Speed, used to be the order of the day. But I had always wondered how the game's AI acted the way it did, how it produced human-like opponents. Now that I'm older, I know that the AI in those games would have used path following algorithms and state control to simulate human-like behaviour.
Although it's a great solution in a simulated world, it rapidly falls apart in the real world where there are no states, no predetermined paths, and no room for error. We have to act on what we see… I was intrigued, and gave myself this task: build a self-driving car in a game environment, where the only information it has access to is what it can see.
The constraints
Due to what this task required me to do, and the limited resources I had at the time, I had to set some reasonable constraints. These included:
- Time: I mostly considered myself a machine-learning hobbyist, and not a professional, and at the time I was also busy with my Masters. Thus, I had to put a limit on the time I spent on this project. I chose two weeks, but ended-up only needing one.
- Budget: I only had a 2GB graphics card at my disposable. As I knew I would be using deep learning for this problem, my GPU memory was a relevant concern as deep learning typically requires a large amount of expensive, heavy-duty memory.
- Performance: Given my time constraints, I knew I wouldn't be able to make a groundbreaking algorithm. As such, I limited my performance goal to: if I could build a model that could drive reasonably well with little-to-no human input, it would be a success.
Figuring out how to go about it
I found a few useful YouTube videos on the topic from Siraj Raval and SethBling, as well as a very informative article by sentdex. Having looked at these, I had a better idea of what I needed to:
- Choose a model small enough to be able to fit on my 2GB GPU with a game running in the background, but also accurate enough to be able to make reasonable predictions.
- Choose a game to act as the simulated environment.
- Record myself playing a game, monitoring my keystrokes as I do so in order to set up a supervised learning problem.
- Use this data to train my model, so that it could make predictions.
- Use these predictions to generate keystrokes in the game, so that the model could control the car.
With those steps laid-out, I could buckle-up and get going.
Step 1: Choosing a model
Our problem is essentially an image recognition problem, that is: given the current visual information from our game, which direction should we go in? From my experience, I knew that a convolutional neural network was likely the best approach for this case, as they form the backbone of state of the art image recognition models. Given my restraints, I knew I needed a model that was small and easy to compute. I also wanted to make a prediction based off of only the single frame displayed on the screen, as using more than one frame would start taxing my GPU memory budget.
Previous models that have worked extremely well in image recognition tasks include VGG16, Inception, and ResNet50. Given that these models were built to classify millions of images into 1000 categories, they tend to be very large - anywhere between 20 to 150 million parameters. These models were too big and couldn't make the cut.
Instead, I decided to build a custom neural net based off the VGG16 architecture, which makes use of a number of blocks (a group of multiple layers) with max-pooling and dropout layers between consecutive blocks. Since I wasn't doing large-scale image recognition, I could adapt the architecture and significantly drop the number of parameters used in-model without significant loss of accuracy.
The architecture I settled on building was a sequential model, with each layer connected to the previous layer as follows:
- A convolutional layer with a kernel size of 3x3, a depth of 32 channels, and a stride of two pixels, activated by a ReLU function.
- A convolutional layer with a kernel size of 3x3, a depth of 32 channels activated by a ReLU function.
- A max pooling layer of size 3x3, essentially dividing the image size by three.
- A dropout layer of with a probability of 0.2.
- Three blocks consisting of two convolutional layers with a kernel size of 3x3, and depth of 32 channels, each activated with ReLU. Each block ended with a max pooling layer of size 2x2, and a dropout layer with probability 0.2
- Three fully connected layers with of size 1024, 1024, and 512, each activated by ReLU. Each fully connected layer is followed by a batch normalisation layer, and a dropout layer with probability 0.2.
- A final, fully connected layer with nine outputs, each of which are mapped to a keystroke combination.
I chose to build the model using the Keras package, as this gives you an incredibly fast way of prototyping deep-learning models. For more details, see my GitHub package. The resulting model consisted of only 3 million parameters (as opposed to 20 million+ for state-of-the-art models) and could easily fit on my GPU while running my game.
Step 2 & 3: Choosing a game, and obtaining data
Next, I needed to record training data.
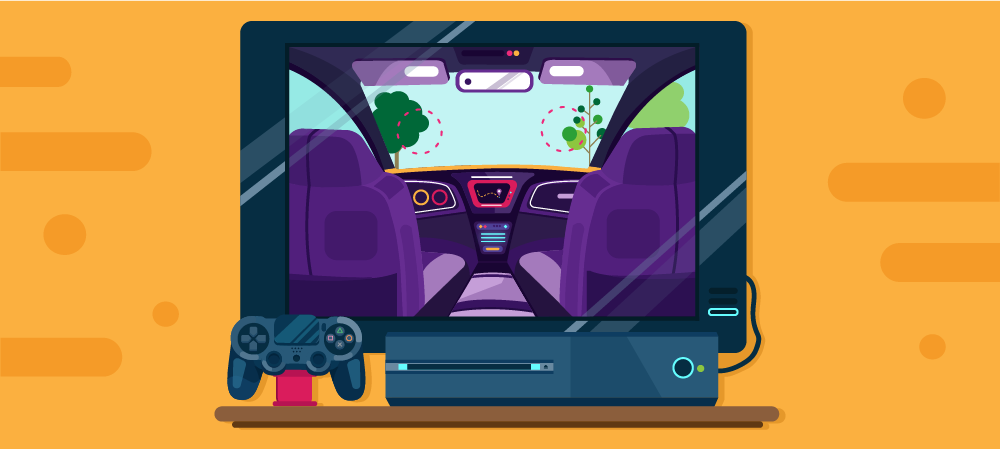
I chose Burnout: Ultimate Paradise for my simulated environment, as it provided a large open world environment with a reasonable amount of obstacles (cars, trees, etc) that had to be avoided. Then, to obtain the data from my playing sessions, I decided to write a small python package I dubbed gamepy. This provided a lot of useful wrappers for recording keystrokes and gameplay.
To accurately collect the training data, I recorded an image of gameplay every 1/30th of a second. Each image would have an associated key press of either up, down, left, or right arrow keys, or combinations thereof. The associations between image and keystroke were stored in a CSV file, which mapped the directory of the saved image to the keystrokes that were recorded at the time. The images are re-scaled to a reasonable size before storing (in my case, from 1920x1080 to 532x299), both to save memory and also to reduce the model size (smaller training images will allow for a smaller model).
Step 4: Training my model
Now that I had data to work with, I could analyse it and train my model. However, a problem that arose after investigating the data showed that the keystrokes were heavily biased towards the "up" key, corresponding to moving forward. Anyone who's ever played a driving game would know that the goal of these games is to essentially move forward, and do so quickly. This lead to a disproportionate amount of frames involved solely with pressing "up."
Out of the roughly 18000 images captured for training:
- 17500 of them corresponded to pressing the "up" key (up, up-left, or up-right)
- 240 images corresponded to either solely pressing left or right,
- 250 contained no keystroke or an invalid combination of keystrokes, and
- The remaining 10 were in reverse (involving the "down" key).
This was a major problem as this could easily lead to model-overfitting, where-by all my model would have to do to achieve 97% accuracy was to predict the "up" keystroke. I needed to balance-out this data.
My first solution
To begin solving this disparity, I decided to categorise my keystrokes using nine one-hot vectors (corresponding to the nine outputs of my model). These vectors would be uniquely mapped to a keystroke or combination thereof (in my case, solely pressing "up" would be associated to a different one-hot vector than pressing "up-left" or "up-right"). This lead to around 12000 images being solely associated with the "up" key, around 2870 images for each of the "up-left" and "up-right" combinations, and the remaining 260 were associated with either no keystroke, or were associated with the "down-left", "down", or "down-right keystrokes."
This helped with the bias somewhat, as we now only had 66% of our images dedicated to a single keystroke; but this was still not satisfactory enough.
My second solution
I now decided to ignore the smallest portion of my data (though still incorporate them in my predictions for generality's sake), and focus solely on the "up", "up-left", and "up-right" data. In order to balance this data, I could either remove a large portion of the solely "up" category until it had matched the number of samples in my "up-left" and "up-right" categories, or duplicate the data in my "up-left" and "up-right" categories. I decided on the latter, as it would allow me the benefit of training on my entire dataset. This amounted to giving the "up-left" and "up-right" categories more weight during my training session.
Final steps
As my GPU could not handle loading all the images in my training sample at once, I had to create a python generator to pass to the fit_generator method of my keras model. The generator would simply load a small batch of images into memory at a time, instead of the entire training set.
Finally, to ensure my model did not overfit, I separated data into a 90% training sample and a 10% validation sample. Now I had what I needed to move on to the next step.
Step 5: Using the model's predictions to control the car
In order for my model to actually "self-drive" I had to develop a way of making predictions during gameplay. This meant I needed to feed the current output of my screen, pre-process the image to suit the necessary size of my model input, and then generate a prediction which would be mapped to a keystroke.
For the screen output, it was as simple as using a screen grab function from PIL and appropriately pre-processing it. In order to generate keystrokes from within python, I used the pynput package, which worked except for one problem: during gameplay, my PC required a different form of input (known as "direct input"), which seemed to communicate with the DirectX API used in most games. The solution to this was finding the correct hex codes that mapped keystrokes to computer inputs, which could then be communicated to the game. To streamline this entire process and do all of this automatically, I built my gamepy package and used the KeyController class within my package..
Results
My model achieved an 80% accuracy on my training and validation sample – an impressive feat, considering it could only make predictions on one image at any given time. The trained model was then placed into a simulated environment, where it could make predictions at a frequency of 15 times a second while a game was running.
After observing the model for over 30 minutes, I concluded that the model can drive reasonably well, although quite chaotically. It is able to follow the road, occasionally avoid other cars, and make turns as appropriate, but would ignore most road rules (though, to be fair, the game does not encourage following such rules to begin with!).
Furthermore, the model would fail on off-road sections, as I never drove in these this while producing the training data. This left the model incapable of making correct predictions. It also lacked temporal coherence - that is, would not be consistent in its predictions over time - which is expected given the lack of sequential modelling. It would occasionally wreck its car, by driving too fast into a wall for example, but the game would reset the position of the car back on track for it to continue driving. "Wrecking," in this case, was not considered to be a hard failure case (one from which the model could not recover), as the game allows for continuation after a wreck has occurred, and in fact actively encourages wrecking in some circumstances.
That said, one hard failure case was particularly surprising. If the model would drive into a wall slowly enough as to not "wreck" itself (which would normally enable the game to reposition it), it would simply continue driving forward into the wall. The model did not understand reversing, as this made up a fraction of the training data; thus, it did not understand what to do in these circumstances. In these instances, I was able to manually intervene and course correct for the car (as can be seen in the YouTube clip).
An elegant solution to this problem came from SethBling, who would run training and testing simultaneously, and record results of what should be the correct key-press while the model was operating. This allowed the human to take control in random intervals and allow the model to learn the human's recovery behaviour in such situations.
Conclusion
In the space of a week, I was able to build and prototype a neural network model that could correctly estimate the keystroke produced from a single image of a driving game 80% of the time. The model was small enough to be able to run on a very limited GPU, while also allowing predictions to be made during gameplay. The resulting model was observed to drive reasonably well within the game after having observed as little as 18000 training images.
Various improvements could be made to the model, such as allowing predictions to arise from sequential data – likely improving the temporal coherence of the model. Further improvements to the training data could also be made by running training and testing simultaneously, allowing the model to learn from a human's recovery efforts from fail states.
Feel like a challenge?
In theory, all this model is doing is predicting a keystroke from an image - so you could apply this to any video game you may have that relies on a keystroke input, and not just driving games. As a challenge to you, see if you can create your own model in less than a week, apply it to one of your own games, and let me know how you get along!
Jason Webster loves exploring the way the universe works. He's recently graduated with an MSc in Physics, and enjoys spending his time exploring the world of science, software, and tech. He is currently employed as a Junior Data Scientist at Explore-AI. You can find his recent developments on GitHub, LinkedIn, and Google Scholar.