Keeping things simple in software engineering is challenging but doable. Simple and elegant solutions are more scalable and maintainable. But you also need the right tool for the job. Here’s how I use Google AppScript to simply solve my real-life problems.

A well-known design principle, which applies to software engineering, is the K.I.S.S principle. This principle can also be found in other concepts like Occam's Razor and Leonardo da Vinci's "Simplicity is the ultimate sophistication". It is especially true for software development since code needs to be maintained and extended. If the code complexity grows exponentially, it will eventually become impossible to change something without breaking it.
The tool you use to create a solution affects your approach to a problem and, ultimately, your code’s complexity. I’ve found that building solutions to real-world problems, like automating my expense tracking, doesn’t require complex code. In these cases, a tool that extends an existing product’s functionality allows you to create more elegant, scalable solutions. For me, that tool is Google AppScript.
How Google AppScript enabled me to create simple solutions to real-world problems
Google AppScript is a JavaScript-like scripting language developed by Google that is tightly integrated with Google Apps. It’s particularly suitable for building automations, add-ons and custom functions for Google’s suite of tools (Spreadsheets, Docs, Forms) because of its integration within the Google Ecosystem. It’s also fully hosted and free. AppScript started as “macros” from Google Sheets, but it evolved into something more robust that lets you integrate and automate tasks across Google products.
I’ve used Google AppScript to solve multiple problems, like tracking expenses and managing local event attendees. The only requirement to use it is having a Google account.
My solution design for multiple problems is quite simple, using just Forms and Spreadsheet. I used Google AppScript to create custom Spreadsheet functions and manage available options in a Form dropdown selector, which was made possible by the available time triggering mechanism. Here’s how I created each of those solutions using AppScript.
How I tracked my monthly expenses usingAppScript and Google Sheets
Because budget tracking apps only tracked transactions linked to my bank card, I couldn’t track what I was spending my money on when I withdrew cash from the ATM, for example. At the same time, I wanted to use something that’s easy to share because my wife also needed to track her expenses with the same tool.
I decided to use Google Sheets and AppScript to build my mini-app because they’re free, cloud-based and require little effort to customise. Also, it was a good opportunity to learn about AppScript and what it can do.
I started with the Google Form, where my wife and I would submit data whenever we spent money. It contains only four questions to make it as simple as possible: date, amount, a short description and a category.

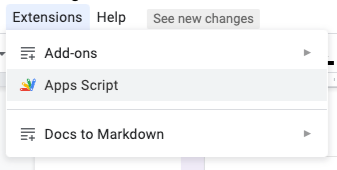
Each record is saved into a Spreadsheet. Then, adding a script is as simple as selecting “Extensions > AppScript”.
Each function defined in the newly opened editor can be accessed in the spreadsheet:


```
    function customSum(value1, value2) {
     return value1 + value2;
    }
```


= CUSTOMSUM(B1, B2)
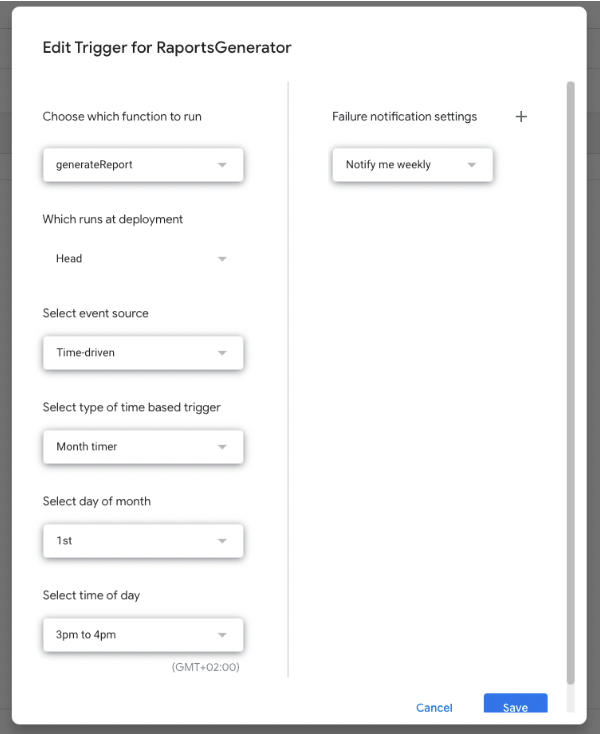
I built some custom functions to extract expenses based on month and category. The functions are used to create a simple dashboard. I’ve scheduled a monthly trigger to compute expenses on the last day of the month and send me an email. (Triggers > Add new trigger)
The dashboard looked something like this (visualised with dummy data):
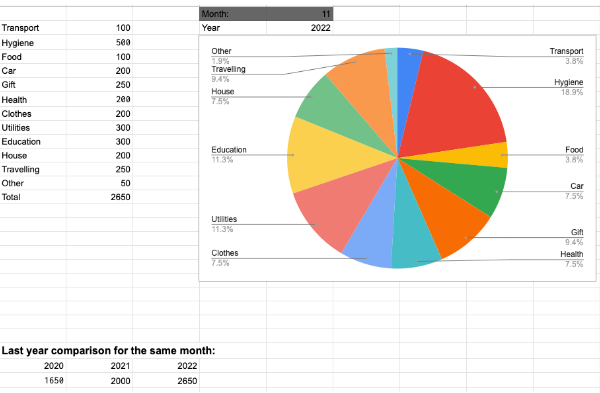
It’s essential to make introducing a new record easy with as few clicks as possible because it’s the main blocker to something that needs to be done regularly. This would be my solution's downside: manually inserting data every time.
Because the solution relies on data submitted via a Google Form, there isn’t a clear solution to this downside. While there may be solutions to fetch data from the bank via an API, I’m unaware of any, and the issue of tracking cash remains. If anyone has any solutions to this downside, I’d love to hear about them!
How I used AppScript with Google Forms to track event responses
My other use case for AppScript is to dynamically update a form based on the responses it receives. I helped a local event with their registration form when they needed a system to book exact seats from the venue. Once someone selected a seat, it needed to be removed from the possible selection.
The use case is simple: Have a list of possible options in a dropdown and auto-update it by removing an option once it’s selected. After this, it needs to send an email to the responder confirming their choice. This involved multiple scripts: one for updating the dropdown choices and one for sending emails._ _
Of course, there are downsides to this solution too. Being tightly coupled with Google and being developed for lightweight applications has its limitations: You need to create a workaround to get details about the entry when a third party submits data on a Google application or be subject to Quotas.
Here’s the workaround I used:
AppScript doesn’t, at least yet, have a method to trigger a script only when new data is entered into a form. Therefore, you need a mechanism to track what rows were already processed.
The way I’ve handled this limitation was by having a boolean flag which was updated after processing the specific row. I added a new column in the responses spreadsheet, “Processed” and “true”, to the handled lines. You can find the code here. To update the values, we need to add the list of choices in a different Spreadsheet.
The basic data flow and setup can be described as follows:
- Have a function which populates the dropdown with the options
- When new Form data is submitted, iterate over the Spreadsheet with the data and only process rows that are not yet handled (“processed” flag described above). After processing, mark the row as processed, and remove the entry from the options spreadsheet.
- When the options Spreadsheet is updated, this will trigger the function which populates the dropdown.
To help you get started, I’ve created a GitHub repository with some useful functions, and these two described mini-apps.
Leveraging Google suite for apps like this has its benefits: It’s cloud-based and took less than 70 lines of code. I’ll be using AppScript again when an opportunity arises. It’s a simple concept that can be used to solve lots of small problems like the ones described in this post. For more complex apps, Google released AppSheet, an app template, but it has the downside of being a paid service.
As developers, we have access to many tools and tutorials on the web. Only some problems we face require a complex distributed microservice architecture with a database replicated to multiple availability zones. Sometimes, a simple script does the job just fine.
Related Resources:
- Programmable Banking Community: How to Build a Low-code Budget Tracking App
- Programmable Banking Community: How To Easily Automate & Analyse Your Personal Finances
- Programmable Banking Community: Banking On Spreadsheets
Adrian Muntean is a passionate full stack developer in the whole JavaScript ecosystem - as well as other technologies. He loves being up to date with the tech world and trying out new trends. He’s involved in the local community in an attempt to share the knowledge and help others.