Most programmers will probably have heard the term Dependency Injection but may be confused about what it actually entails. You may have come into contact with interfaces and containers when using it and found yourself completely stumped. Alternatively, you might never have heard of Dependency Injection and are wondering what on earth I’m talking about here. In this article, I will walk you through how simple the concept really is and how powerful it can be.

Dependency Injection is a concept that can be used as a standalone. It can, however, also be used alongside interfaces and DI/IoC containers too. When working with it in this capacity, it can seem confusing and this confusion is something that I experienced.
Throughout my career as a .Net/C# developer, I had been accustomed to using Dependency Injection in its purest form. I had never touched a container or an interface when working with Dependency Injection and so, when I recently started in my new role and was tasked with using the concept as well as containers such as Unity, I really began to doubt what I knew.
After a few weeks, however, I realised how containers and interfaces do not complicate Dependency Injection but rather expand what it can do.
(Something that is important to note: Interfaces and containers are only used in the context of Dependency Injection. You can do Dependency Injection without interfaces or containers, but really, the only purpose for interfaces or containers is to facilitate Dependency Injection.)
Here, I’ll show you how to do Dependency Injection, with and without interfaces and containers. By the end of this piece, you'll hopefully have a clear idea of how Dependency Injection works and feel empowered to make informed decisions about when and where to use interfaces and containers when working with it.
Setting Up
To better understand Dependency Injection in its purest form, we’re going to go through an example application, written in C#.
To begin with, the application will be written without any form of Dependency Injection whatsoever. We will then introduce it through simple logging functionality.
As we go, you will see the logging requirements becoming more complicated, and we will satisfy those requirements through the use of Dependency Injection, to keep the Calculator class’ responsibilities to a minimum. Dependency Injection will also keep us from having to modify the Calculator class every time we want to change the way logging works.
The Application
Consider the following code. This is the code for a simple calculator application, that will take in two numbers, an operator, and display the result. (This is a simple, working console application, so you can feel free to create a C# Console Application in Visual Studio and paste the following code in, if you want to follow along. It should run just fine.)
We have a Calculator class, and the main Program class which uses it.
Program.cs
using System;
using System.Linq;

namespace OfferZenDiTutorial
{
    class Program
    {
        static void Main(string[] args)
        {
            var number1 = GetNumber("Enter the first number: > ");
            var number2 = GetNumber("Enter the second number: > ");
            var operation = GetOperator();
            var calc = new Calculator();
            var result = GetResult(calc, number1, number2, operation);
            Console.WriteLine($"{number1} {operation} {number2} = {result}");
            Console.Write("Press any key to continue...");
            Console.ReadKey();
        }

        private static float GetNumber(string message)
        {
            var isValid = false;
            while (!isValid)
            {
                Console.Write(message);
                var input = Console.ReadLine();
                isValid = float.TryParse(input, out var number);
                if (isValid)
                    return number;

                Console.WriteLine("Please enter a valid number. Press ^C to quit.");
            }

            return -1;
        }

        private static char GetOperator()
        {
            var isValid = false;
            while (!isValid)
            {
                Console.Write("Please type the operator (/*+-) > ");
                var input = Console.ReadKey();
                Console.WriteLine();
                var operation = input.KeyChar;
                if ("/*+-".Contains(operation))
                {
                    isValid = true;
                    return operation;
                }

                Console.WriteLine("Please enter a valid operator (/, *, +, or -). " +
                                  "Press ^C to quit.");
            }

            return ' ';
        }

        private static float GetResult(Calculator calc, float number1, float number2,
            char operation)
        {
            switch (operation)
            {
                case '/': return calc.Divide(number1, number2);
                case '*': return calc.Multiply(number1, number2);
                case '+': return calc.Add(number1, number2);
                case '-': return calc.Subtract(number1, number2);
                default:
                    // Should never happen if our previous validations are working
                    throw new InvalidOperationException("Invalid operation passed: " +
                                                        operation);
            }
        }
    }
}
The main program runs, asks the user for two numbers and an operator, and then calls a Calculator class to perform a simple calculation on those two numbers. Then, it prints the result of the operation. Here’s the Calculator class.
Calculator.cs
namespace OfferZenDiTutorial
{
    public class Calculator
    {
        public float Divide(float number1, float number2)
        {
            return number1 / number2;
        }

        public float Multiply(float number1, float number2)
        {
            return number1 * number2;
        }

        public float Add(float number1, float number2)
        {
            return number1 + number2;
        }

        public float Subtract(float number1, float number2)
        {
            return number1 - number2;
        }
    }
}
Logging
The application works great, but imagine your boss decides that they now want the application to log all the operations to a file on disk, so you can see what people have been doing.
This doesn’t sound like too much of a problem, right? You simply add instructions to write everything the Calculator is asked to do out to a text file. Your Calculator now looks like this:
Calculator.cs
using System.IO;

namespace OfferZenDiTutorial
{
    public class Calculator
    {
        private const string FileName = "Calculator.log";

        public float Divide(float number1, float number2)
        {
            File.WriteAllText(FileName, $"Running {number1} / {number2}");
            return number1 / number2;
        }

        public float Multiply(float number1, float number2)
        {
            File.WriteAllText(FileName, $"Running {number1} * {number2}");
            return number1 * number2;
        }

        public float Add(float number1, float number2)
        {
            File.WriteAllText(FileName, $"Running {number1} + {number2}");
            return number1 + number2;
        }

        public float Subtract(float number1, float number2)
        {
            File.WriteAllText(FileName, $"Running {number1} - {number2}");
            return number1 - number2;
        }
    }
}
This works beautifully. Every time the Calculator does anything, it writes to a file called Calculator.log in its start-up directory.
Ah, but you may ask yourself, should the Calculator class really be responsible for writing to a text file?
The FileLogger Class
No. No, it should most certainly not. So that we don’t violate the Single Responsibility principle, everything to do with writing to that log file should happen in its own, self-contained class. Let’s do that now.
The first thing you want to do is to create a brand new class, called FileLogger. It looks like this:
FileLogger.cs
using System;
using System.IO;

namespace OfferZenDiTutorial
{
    public class FileLogger
    {
        private const string FileName = "Calculator.log";
        private readonly string _newLine = Environment.NewLine;

        public void WriteLine(string message)
        {
            File.AppendAllText(FileName, $"{message}{_newLine}");
        }
    }
}
There. Now, anything to do with creating the log file and writing to it is handled by this class. Also, a nice little bonus feature is that whatever consumes this class doesn’t need to worry about appending a new line after every entry. All they need to do is call our WriteLine method, and we’ll handle that for them. Isn’t that cool?
In order to use a class, we need an object that instantiates that class. Let’s do that now inside the Calculator class. Replace the contents of Calculator.cs with the following:
Calculator.cs
namespace OfferZenDiTutorial
{
    public class Calculator
    {
        private readonly FileLogger _logger;

        public Calculator()
        {
            _logger = new FileLogger();
        }

        public float Divide(float number1, float number2)
        {
            _logger.WriteLine($"Running {number1} / {number2}");
            return number1 / number2;
        }

        public float Multiply(float number1, float number2)
        {
            _logger.WriteLine($"Running {number1} * {number2}");
            return number1 * number2;
        }

        public float Add(float number1, float number2)
        {
            _logger.WriteLine($"Running {number1} + {number2}");
            return number1 + number2;
        }

        public float Subtract(float number1, float number2)
        {
            _logger.WriteLine($"Running {number1} - {number2}");
            return number1 - number2;
        }
    }
}
So now, our calculator doesn’t need to care how our new logger ends up writing to the file, or where the file is, or even if it’s writing to the file. But there is still a problem: Should the Calculator class even be expected to know how to create a logger?
Dependency Injection
It most certainly should not!
And that, constant reader, is where the concept of Dependency Injection comes in. Let’s change the constructor of our Calculator class:
Calculator.cs
        public Calculator(FileLogger logger)
        {
            _logger = logger;
        }
That’s it. Everything else about this class stays the same.
Dependency Injection is part of a larger topic called “Inversion of Control”, which is beyond the scope of this article.
All you need to know is that we’re inverting the control of the logger class, or to use a phrase I heard somewhere, we’re making the creation of the
FileLoggersomebody else’s problem, by injecting an instance of aFileLoggerinto our calculator, instead of expecting theCalculatorclass to know how to create one.
So, whose responsibility is it?
It’s going to have to be whoever instantiates the Calculator class in the first place. In our case, that’s our main program.
To demonstrate, we change the Main method of our Program.cs file to be as follows:
Program.cs
        static void Main(string[] args)
        {
            var number1 = GetNumber("Enter the first number: > ");
            var number2 = GetNumber("Enter the second number: > ");
            var operation = GetOperator();
            // The following two lines have changed
            var logger = new FileLogger();
            var calc = new Calculator(logger);
            var result = GetResult(calc, number1, number2, operation);
            Console.WriteLine($"{number1} {operation} {number2} = {result}");
            Console.Write("Press any key to continue...");
            Console.ReadKey();
        }
The lines indicated are the only two lines that need to change. Instead of expecting the Calculator class to instantiate a FileLogger, Main does it for them, and passes it in.
So this, in a nutshell, is the definition of Dependency Injection. There’s no need for interfaces or IoC containers or anything like that. Basically, if you’ve ever done anything like this, you’ve done Dependency Injection. Pretty cool, huh?
Enrichment: A different kind of logger
Having said that, interfaces have their place, and Dependency Injection is what really makes them shine.
Suppose you have a client who decides that logging every call to Calculator is a waste of time and disk space, and they’d rather not log anything at all?
Do you think it should be necessary to make changes inside the Calculator, and potentially re-compile and redistribute the assembly it’s in, in order to achieve that?
Well, that’s where interfaces come in.
Let’s create one now. We’ll call it ILogger, since our FileLogger class is going to implement it.
ILogger.cs
namespace OfferZenDiTutorial
{
    public interface ILogger
    {
        void WriteLine(string message);
    }
}
As you can see, it defines a single method: the WriteLine method implemented by our FileLogger. Let’s go ahead and formalise this relationship, by making that class officially implement our new interface:
FileLogger.cs
public class FileLogger : ILogger
That’s the only change we need to make to that file. Everything else remains the same.
Now that we’ve defined this relationship, what can we do with it?
Well, let’s start off by changing the Calculator class to use an ILogger instead of the concrete FileLogger implementation:
Calculator.cs
        private readonly ILogger _logger;

        public Calculator(ILogger logger)
        {
            _logger = logger;
        }
At this point, the code will continue to compile and run just fine. We’re passing in a FileLogger from the main program method, which implements ILogger. The only difference is, not only does Calculator not need to know how to create a FileLogger, it doesn’t even need to know what kind of logger it’s being given.
As long as whatever you give it implements the ILogger interface (and hence, has a WriteLine) method, it can use it.
Now, let’s add another implementation of the ILogger interface. This one will be a class that does nothing when its WriteLine method is called. We’ll call it NullLogger, and it looks like this:
NullLogger.cs
namespace OfferZenDiTutorial
{
    public class NullLogger : ILogger
    {
        public void WriteLine(string message)
        {
            // Do nothing in this implementation
        }
    }
}
This time, we don’t have to change anything about the Calculator class, if we want to use the new NullLogger, since the former already accepts anything that implements ILogger.
All we have to do is change the Main method of our Program.cs file, to pass in a different implementation. Let’s do that – change the Main method to be the following:
Program.cs
        static void Main(string[] args)
        {
            var number1 = GetNumber("Enter the first number: > ");
            var number2 = GetNumber("Enter the second number: > ");
            var operation = GetOperator();
            var logger = new NullLogger(); // This line needs to change
            var calc = new Calculator(logger);
            var result = GetResult(calc, number1, number2, operation);
            Console.WriteLine($"{number1} {operation} {number2} = {result}");
            Console.Write("Press any key to continue...");
            Console.ReadKey();
        }
Again, only the line indicated needs to change. If we want to use a different kind of logging mechanism (say, one that writes to the Windows Event Log, or sends an email or SMS notification), all we need to do is pass in a different implementation of the ILogger interface.
A quick caveat about interfaces
As you’ve seen, interfaces can be incredibly powerful, but they do add an extra abstraction, and extra complexity, to an application. Containers might be able to help with that complexity, but as you’ll see in the next section, you have to register all your interfaces, something you don’t have to do with concrete types.
There is such a thing as “obfuscation by abstraction”, which basically talks about making a project needlessly complex, for the sake of implementing all these different layers. If you can, you should avoid using interfaces unless you can justify a specific need for them, and in general, you should never create an interface that only ever has one implementation.
Dependency Injection Containers
The example we’ve been going through in this article is a simple one, constituting a single class with a single dependency. Now, imagine that class had multiple dependencies, and each one of those dependencies had other dependencies. For even moderately complex projects, you’ll probably find yourself in situations like that fairly easily, and it can be tough to remember to create all those classes, as well as remember which one relies on which – especially if you do happen to use interfaces.
Enter the Dependency Injection container. This makes things easy for you, but how it does that can be really confusing when you’re just learning about them. At first glance, they can even seem a bit like magic.
We’re going to be using the Unity Container in this example, but there are many others to choose from. Other popular containers include Castle Windsor, Ninject, and others. There really is no functional difference between any of them. The syntax and style might be a bit different from one to the other, but it all comes down to your personal preference and development background (and, of course, what your company prescribes!).
Let’s walk through an example using Unity, and I’ll try to explain what it does.
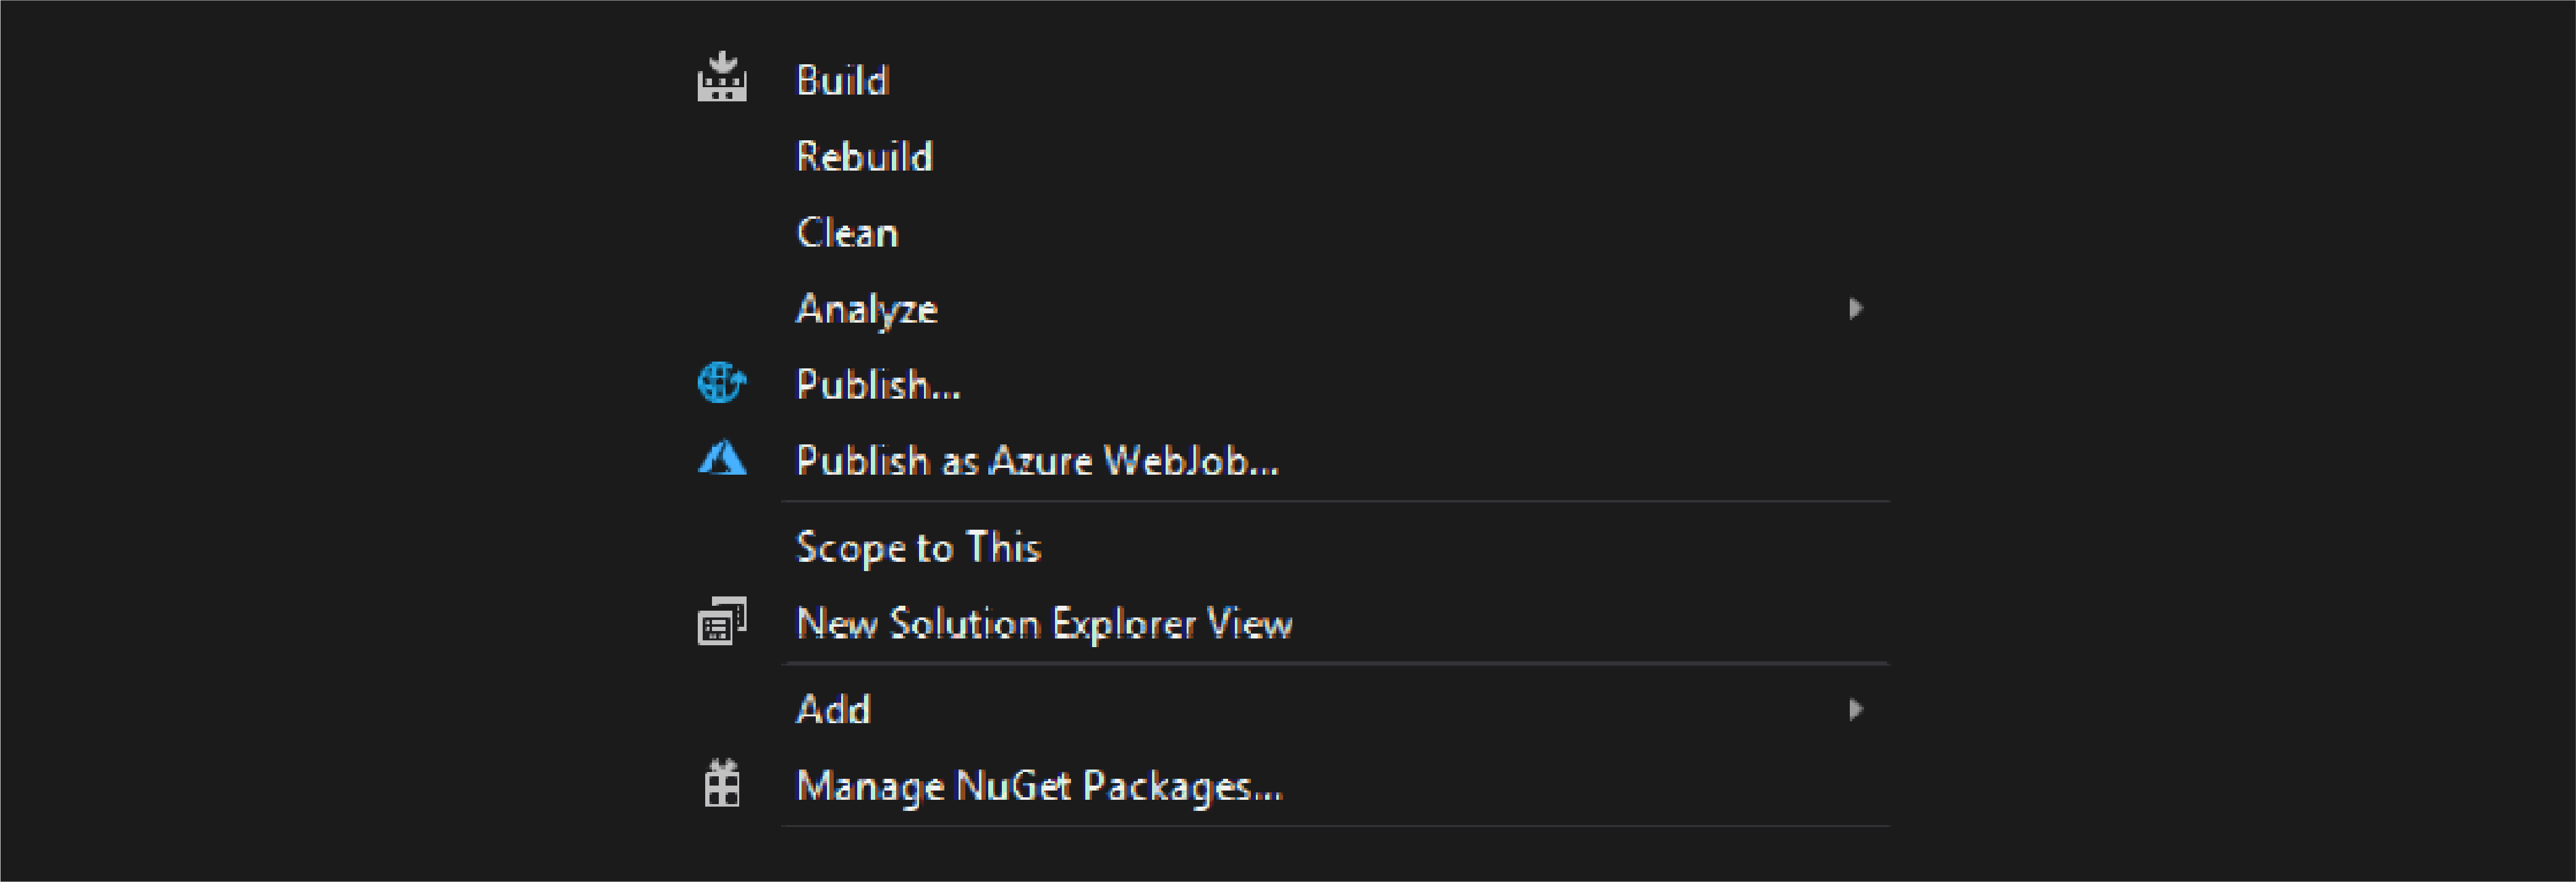
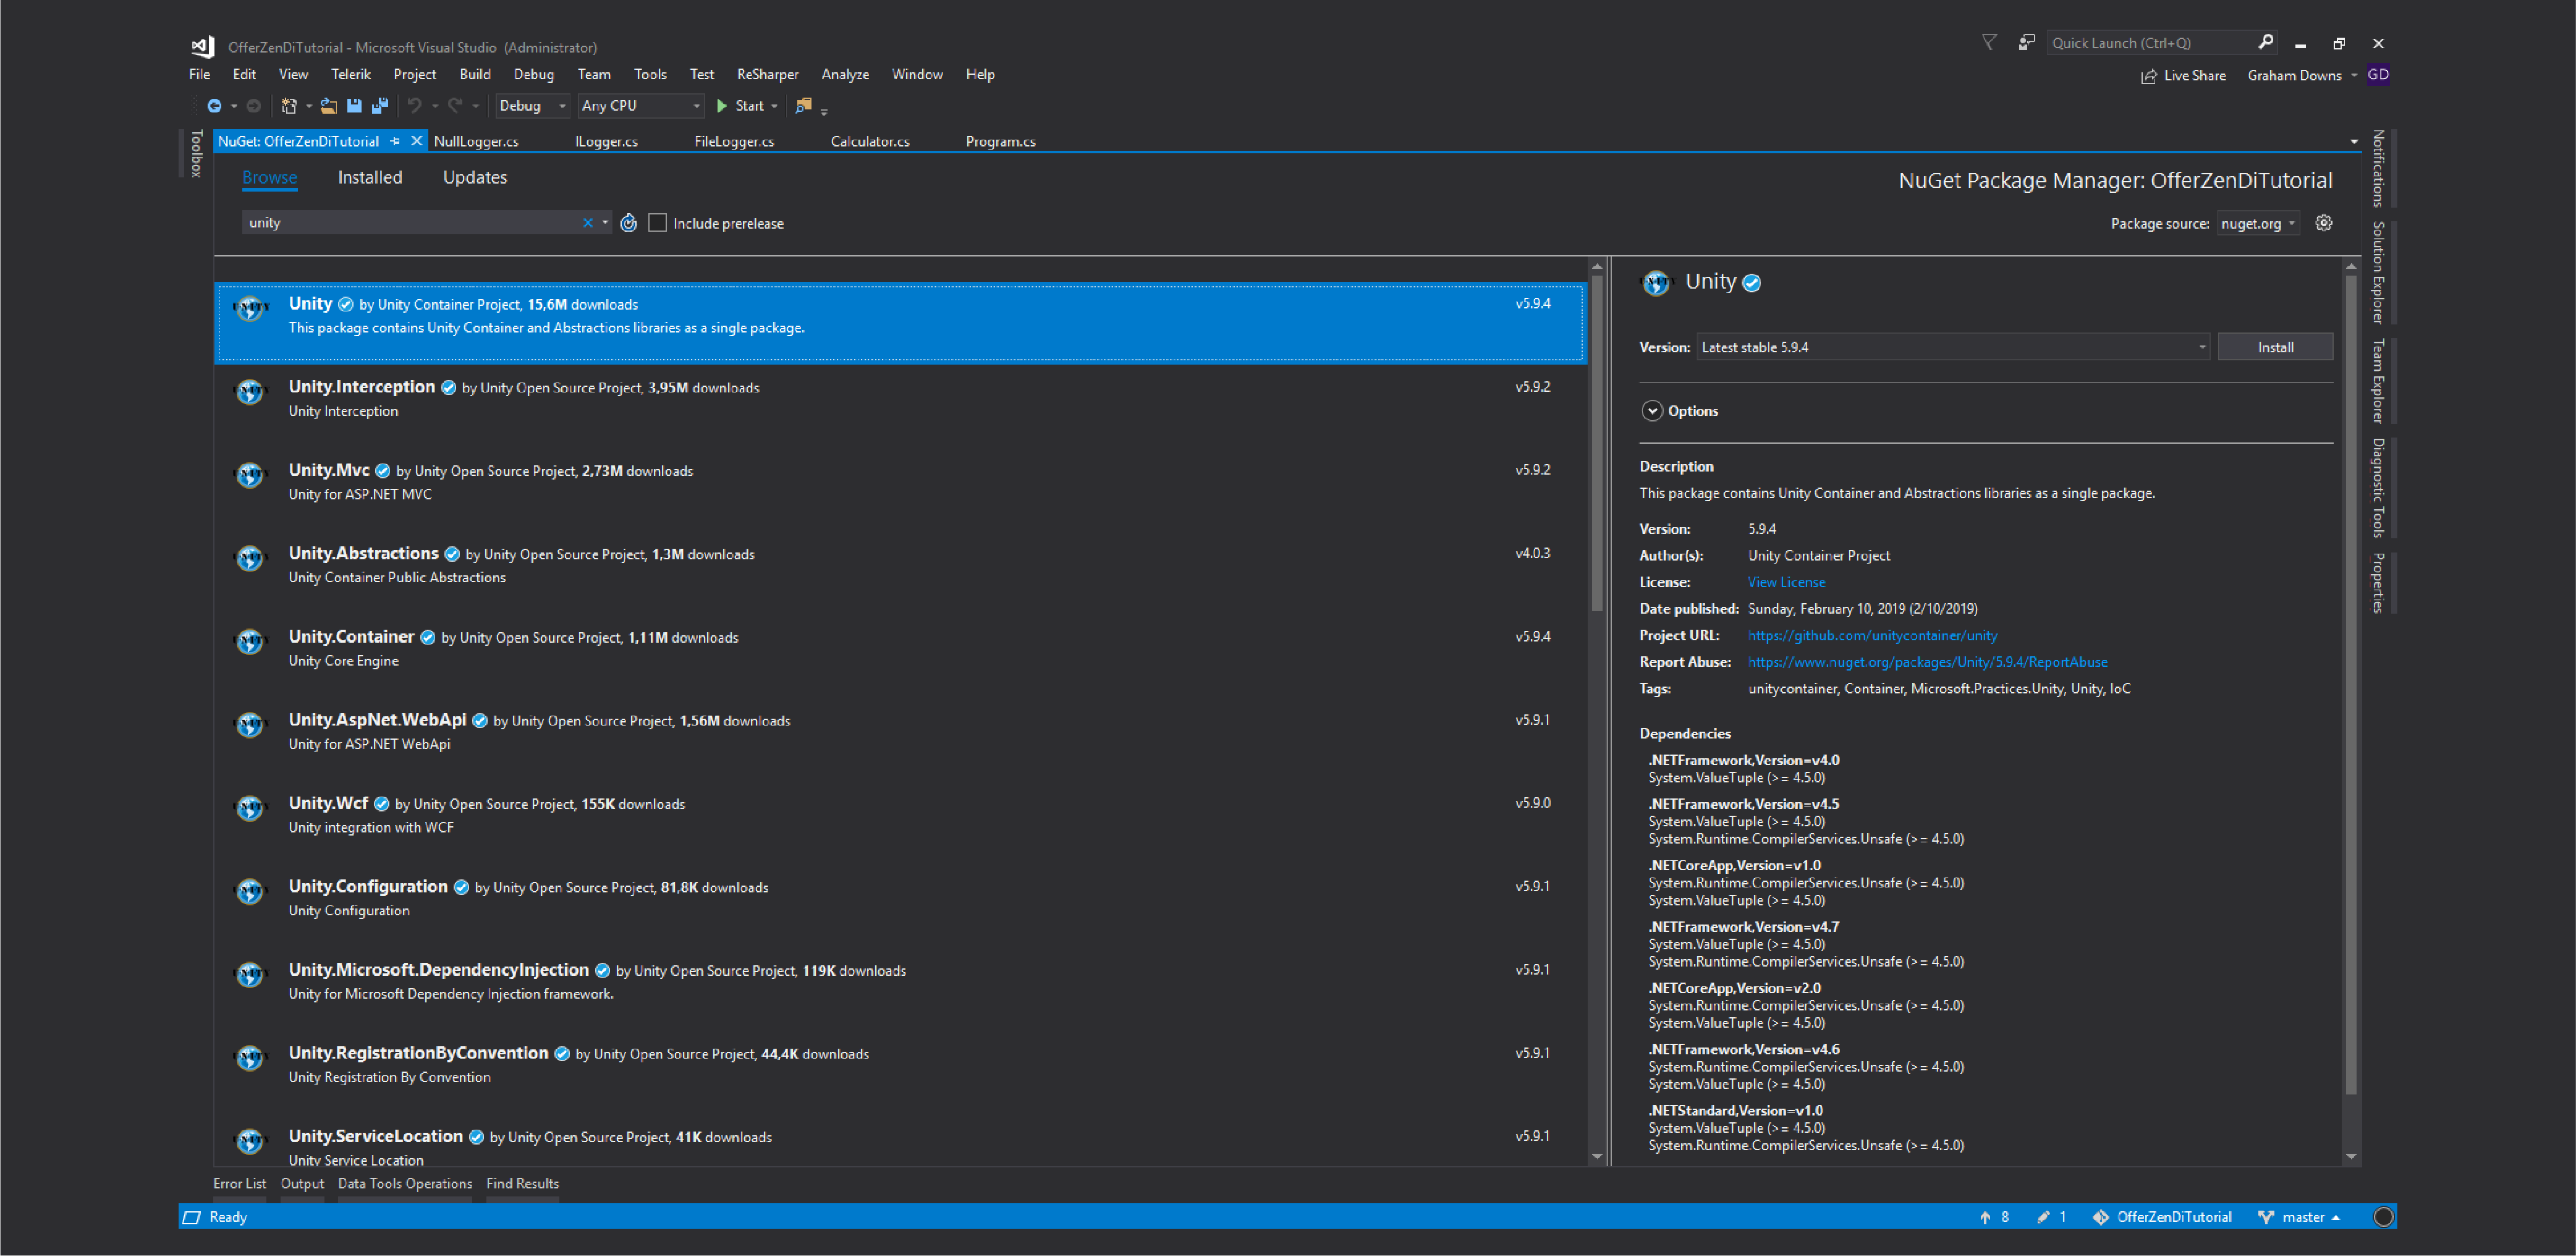
The first thing you’re going to want to do, is to add a reference to Unity. Thankfully, that’s a Nuget package, so right-click your project in Visual Studio, and click Manage Nuget Packages:
Find and install the package called Unity by Unity Container project:
Now we’re ready. Modify the Main method of Program.cs as follows:
Program.cs
        static void Main(string[] args)
        {
            var number1 = GetNumber("Enter the first number: > ");
            var number2 = GetNumber("Enter the second number: > ");
            var operation = GetOperator();
            // The following three lines need to change
            var container = new UnityContainer();
            container.RegisterType<ILogger, NullLogger>();
            var calc = container.Resolve<Calculator>();
            var result = GetResult(calc, number1, number2, operation);
            Console.WriteLine($"{number1} {operation} {number2} = {result}");
            Console.Write("Press any key to continue...");
            Console.ReadKey();
        }
Again, it’s only the lines indicated that need changing, and we also don’t need to change anything in the Calculator class, or any of the loggers or their interface; they are now being injected at runtime, so if we want a different logger, all we need to do is change the concrete class that gets registered for ILogger.
When you run this code for the first time, you may encounter the following error:
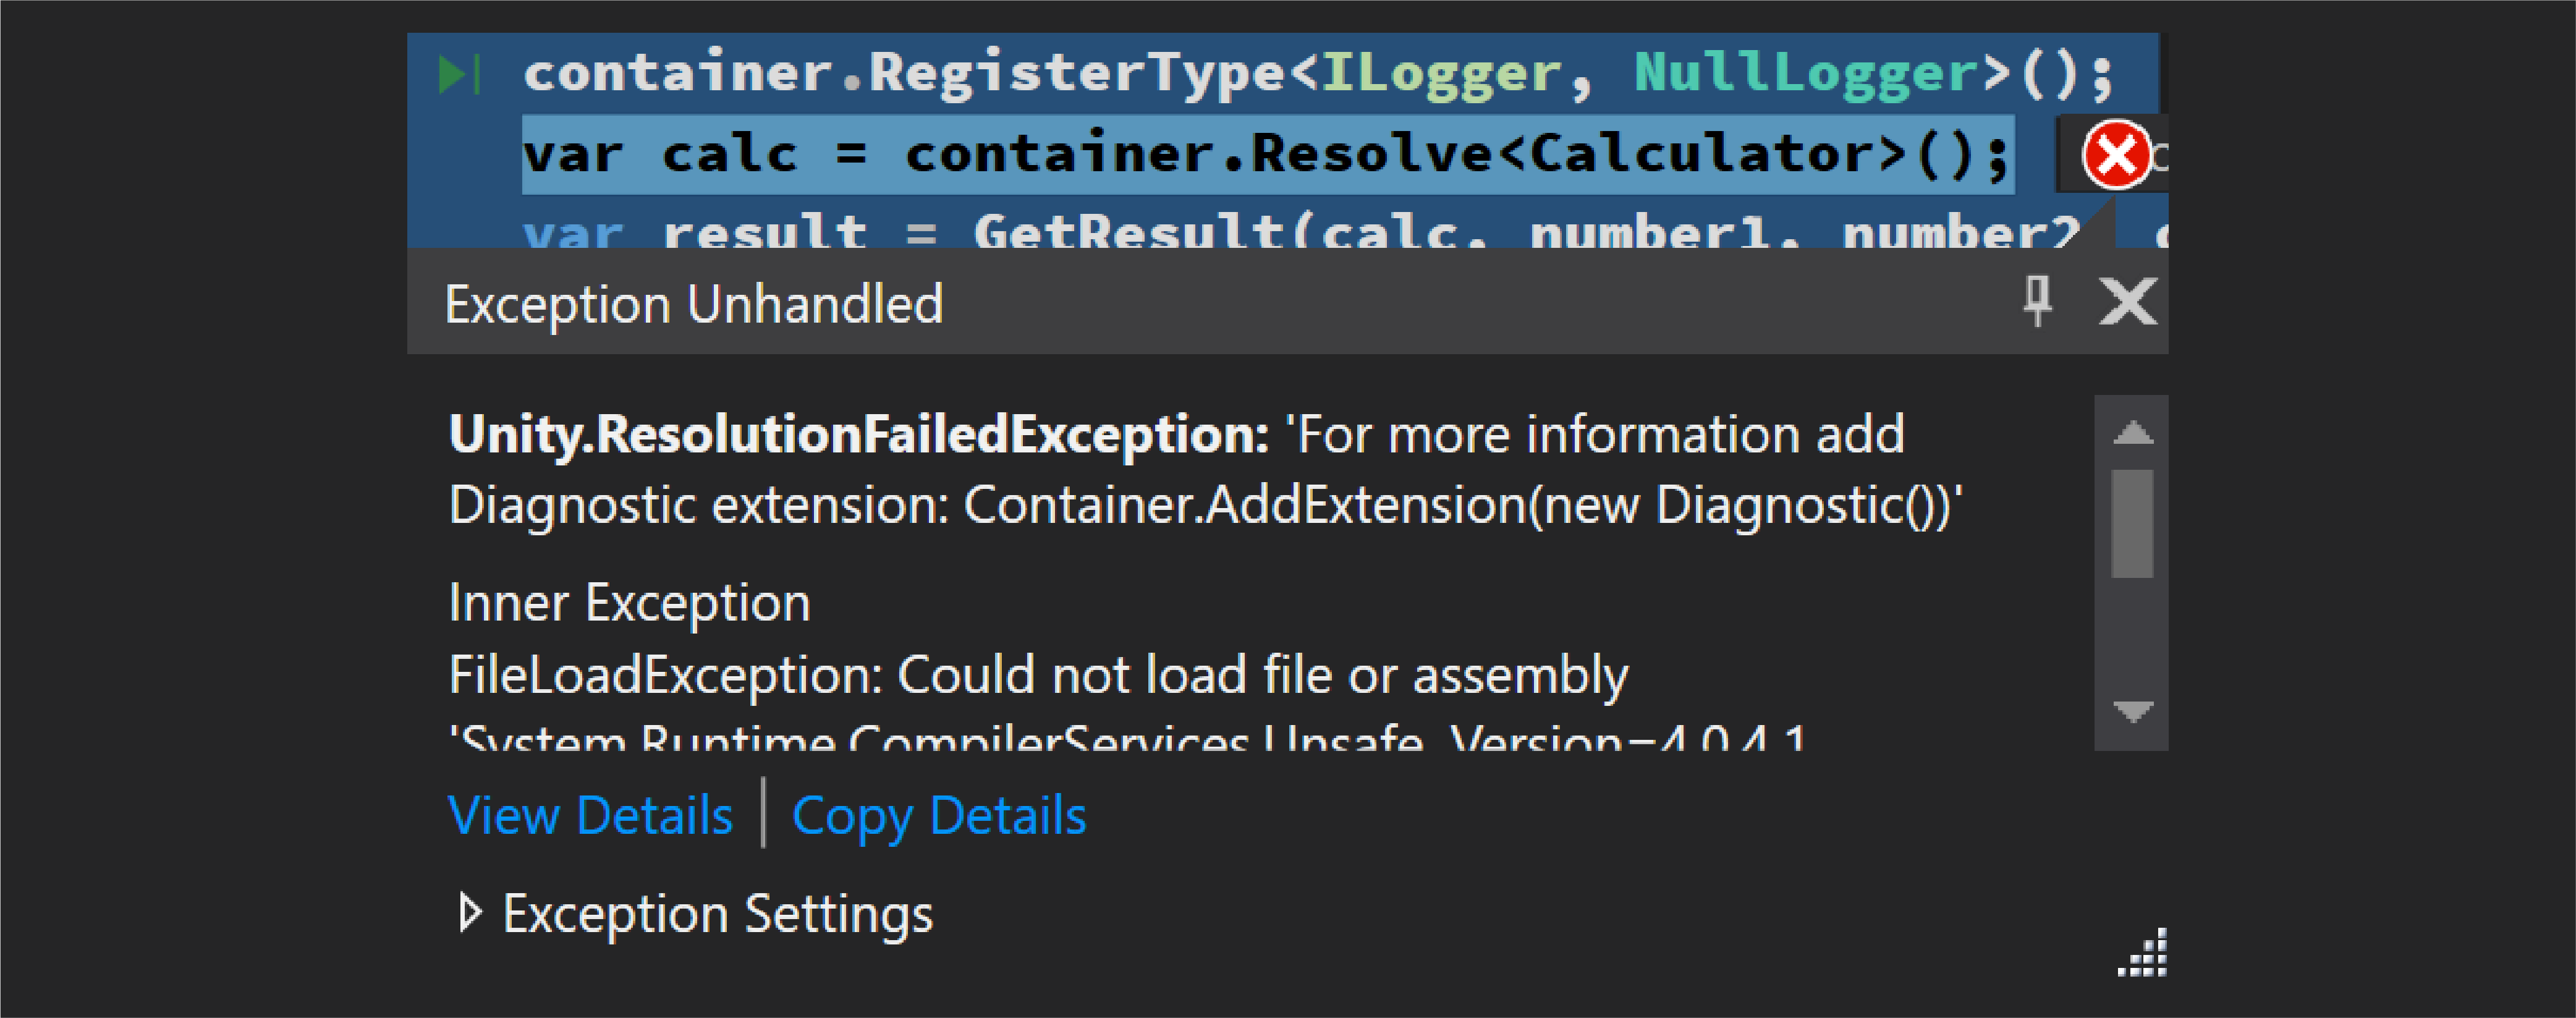
This seems to be an idiosyncrasy with the version of the Unity package that’s available at the time of this writing. Hopefully, by the time you read this, it won’t be an issue anymore.
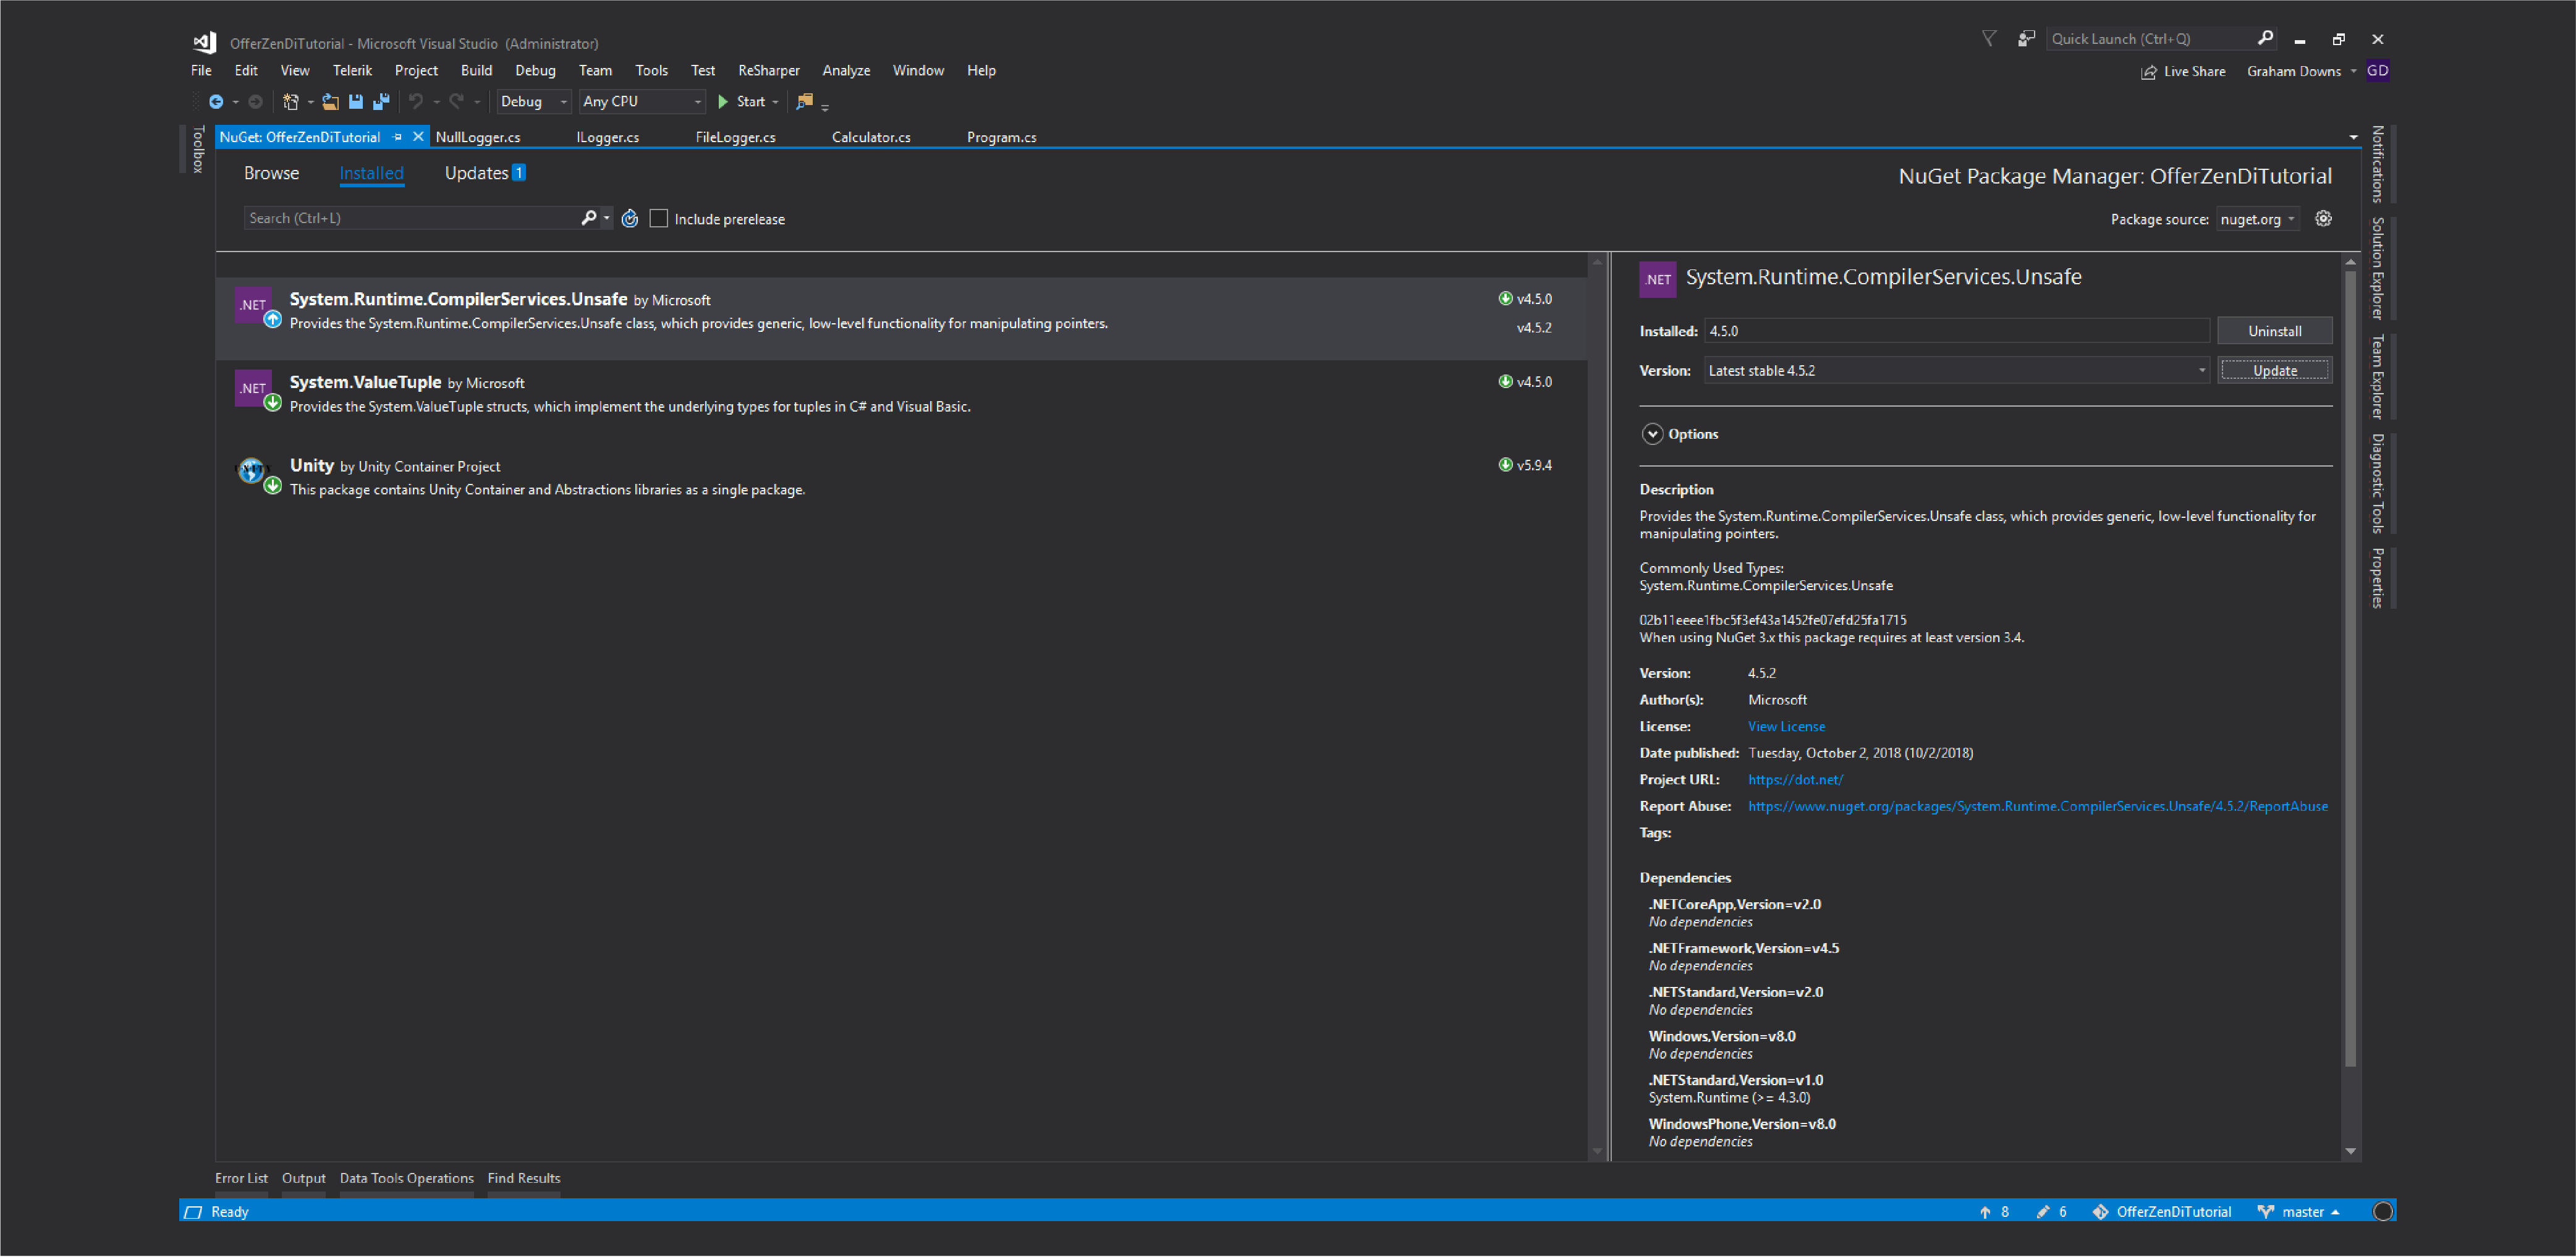
It’s caused by the fact that, when you install Unity, it installs the wrong version of another package, System.Runtime.CompilerServices.Unsafe. If you get this error, all you need to do is go back into Nuget Package Manager, find that package under the “Installed” tab, and upgrade it to the latest stable version:
Now that the project’s working, what exactly is it doing? When you first run code like this, you might be tempted to think it’s magic. I’m going to walk you through what’s going on, and hopefully demystify the process so you’re not afraid of using these containers moving forward.
It all starts on the line var calc = container.Resolve<Calculator>();, so I’m going to start there and walk you through the internal dialogue (if you will) that the container goes through when it sees this instruction.
- “I’ve been asked to resolve something called a
Calculator. Do I know what that is?” - “I can see there’s a class called
Calculatorin the current process tree. It’s a concrete type, so there’s only one implementation. I’ll just create an instance of that. What do the constructors look like?” - “Hmm, there’s only one constructor, and it takes something called an
ILogger. Do I know what that is?” - “I found it, but it’s an interface. Has anyone told me how to resolve it?”
- “Yes, they have! The previous line told me that, whenever I have to resolve an
ILogger, I should pass an instance of theNullLoggerclass.” - “Okay, so here’s
NullLogger. It has a parameterless constructor. I’ll just create an instance.” - “I’ll pass that instance to the constructor of
Calculator, and then return that instance tovar calc.”
Note that if NullLogger had a constructor that requested additional types, the container would just repeat the process from point 3. It basically goes through and tries to resolve all types it finds into concrete instances, automatically.
Also see in point 2, that developers don’t need to explicitly register concrete types. They can if they want to, for example to change the lifecycle, or pass in derived classes, etc. But this is another reason to avoid creating interfaces unless there’s a specific need.
And that’s it! Nothing arcane or particularly mysterious.
Other possibilities
It’s worth noting that there are a few more things that a container can do for you, that would be rather difficult (but not impossible) to implement by yourself. These are things like lifecycle management and method and property injection. They’re beyond the scope of this article, because it’s unlikely you’ll have a need for these techniques when you’re first starting out. But I urge you to have a read through the documentation, once you’re comfortable, and want to see what else is possible.
If you’d like to play with the samples we’ve covered in this article, feel free to clone the GitHub repo at: https://github.com/GrahamDo/OfferZenDiTutorial.git. There are seven branches, one for each iteration we’ve covered.
Happy coding!
Graham Downs is a software developer from Johannesburg. He’s been coding professionally for over 20 years, and has experience in a wide range of industries, having worked with a wide range of technologies. He enjoys reading fiction in all genres, and self-publishes his own stories in his spare time.